AppSense DataNow 4.1 Step by step

Firstly, what is AppSense DataNow? AppSense DataNow enables securely access user and business data on any device anywhere.

Several components encompass a DataNow:

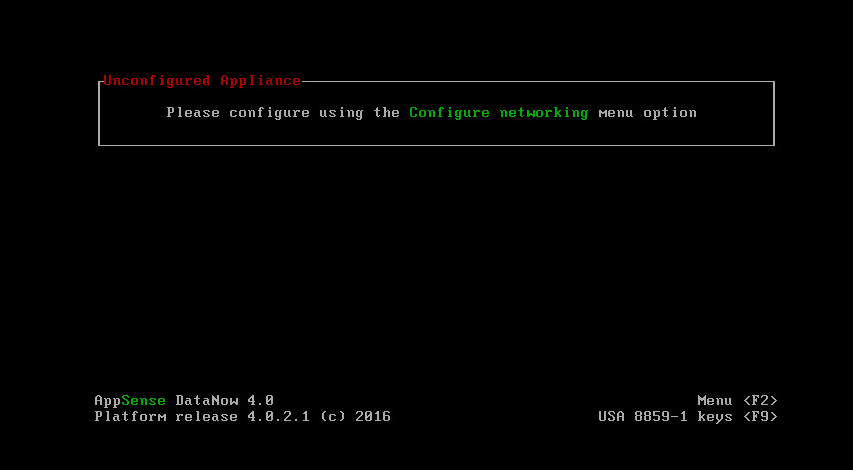
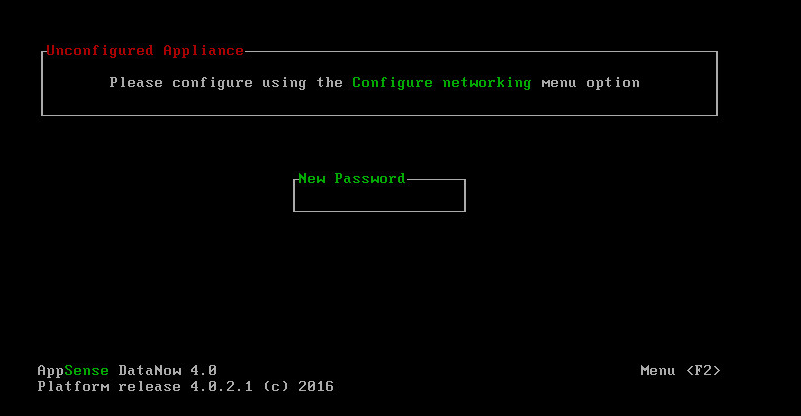
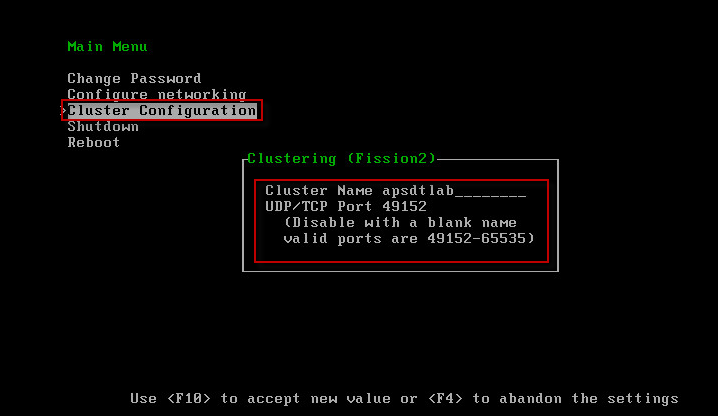
– DataNow server Appliance – AppSense Propitiatory version of Free BSD
-DataNow Agent for Windows and Mac OS
– iOS and Android agent
– File Storage DataNow supports (SMB2.0,3.0 and 3.0.1 along with SMB encryption as long as back-end storage is compatible)

DataNow sync users data and file with storage platform inside the enterprise. Which keep files secure and backed-up. DataNow client supports Microsoft Desktop and Server OS (Citrix XenApp and HorizonView RDSH), Macs, iOS and Android device. A user can work with files on any device and a datanow agent will synchronize the file across the device. DataNow agent and backed appliance guarantees that file is always synced back to the file storage and ready for use on the other device. DataNow also supports file access over the web using any major browser. A user can upload and download any files using browsers and upload it back. DataNow also supports the offline access as well as on-demand access for non-persistence VDI use case. DataNow can also support Microsoft One Drive.

Minimum requirements for  AppSense DataNow:

– A Hypervisor that can support virtual appliance

– DataNow supports VMWare Hypervisor
– Microsoft Hyper-V
– Citrix XenServer

– SMB Storage

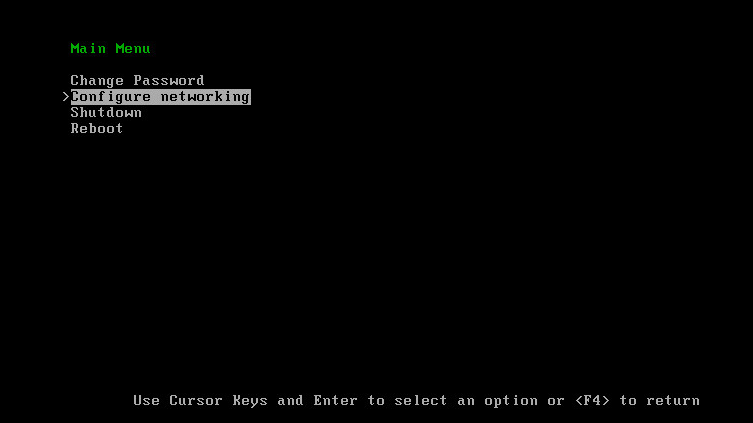
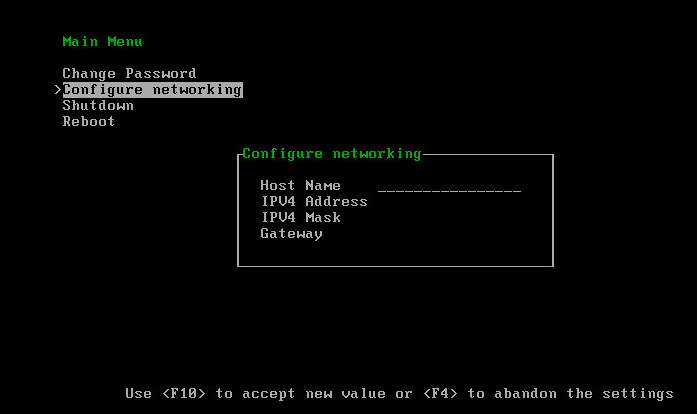
I will walk through for step by step installation of appliance version in VMware hypervisor as well as on Part 2 client configuration.

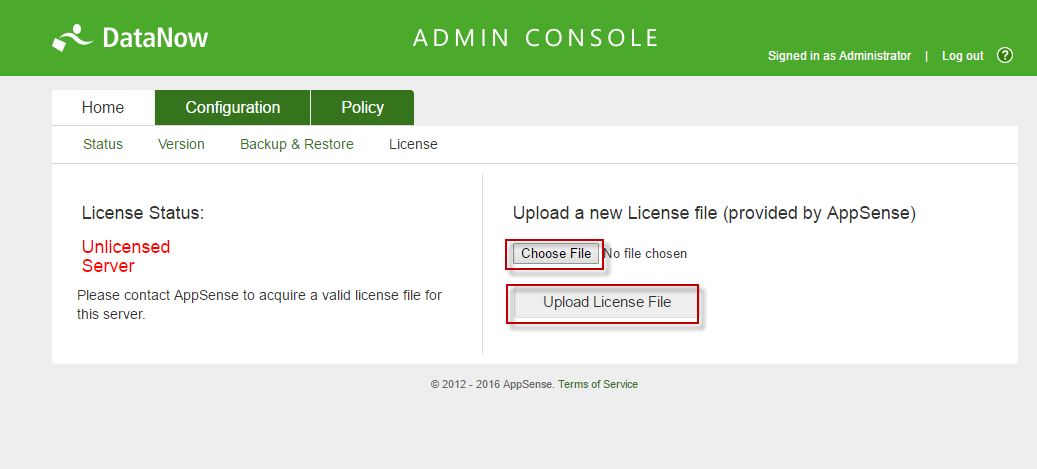
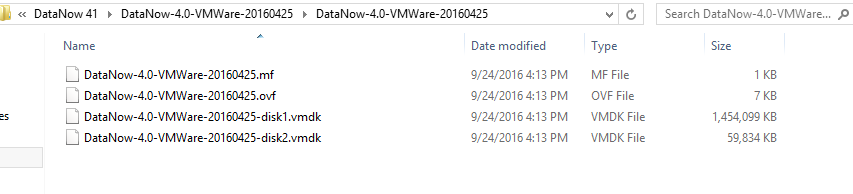
First, need to download DataNow Appliance image for VMWare ESXi from the AppSense Support portal. (myappsense.com/support)

Import OVF Template: 
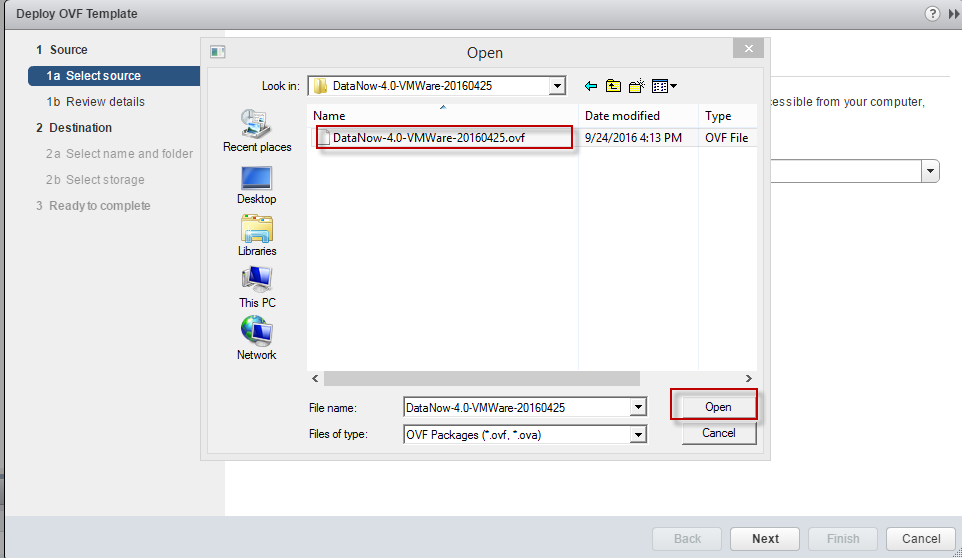
Once you have image download to local computer you can unzip the folder and log back to vSsphere web client to import the OVF template. In this series, I will download the ESXi image and then, later on, will update the appliance to version 4.1

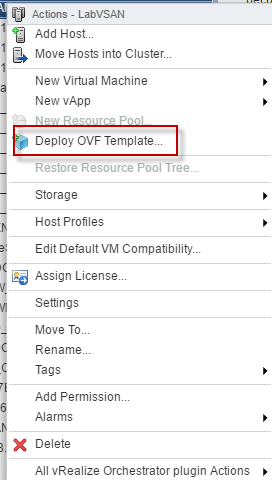
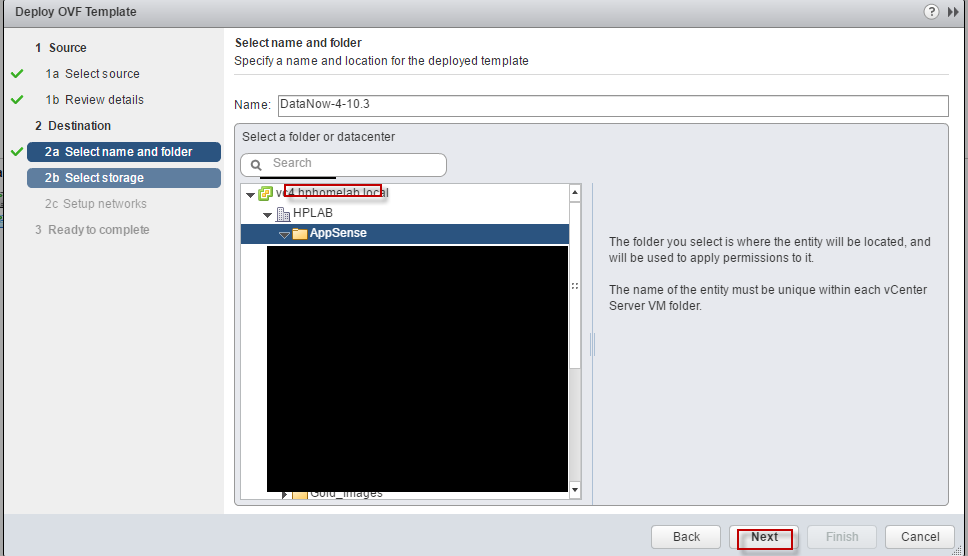
On vSphere web client select the cluster that you want to import the ovf and right click on the cluster and select Deploy OVF Template

Select Local File and click on Browse, Browse the location where you download the image from AppSense support portal.

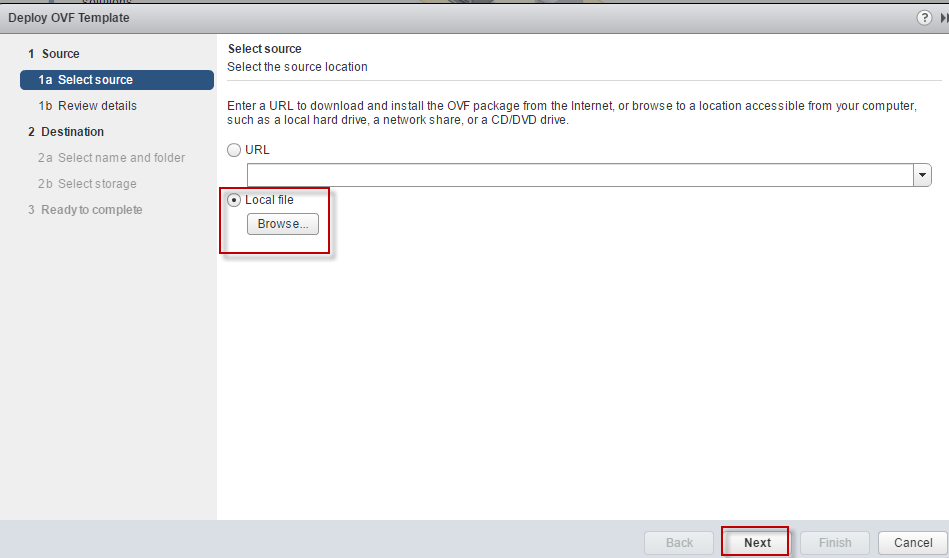
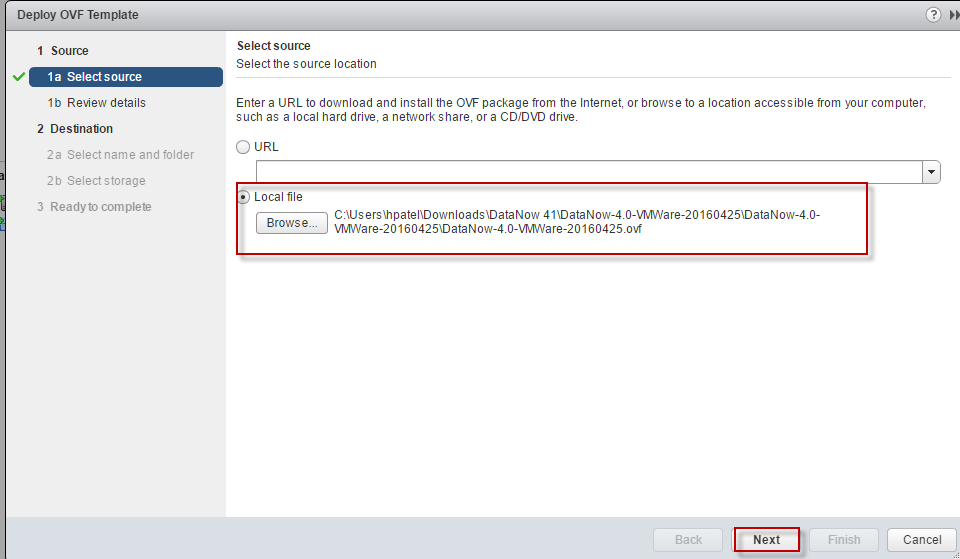
Select ovf file from the image and click next

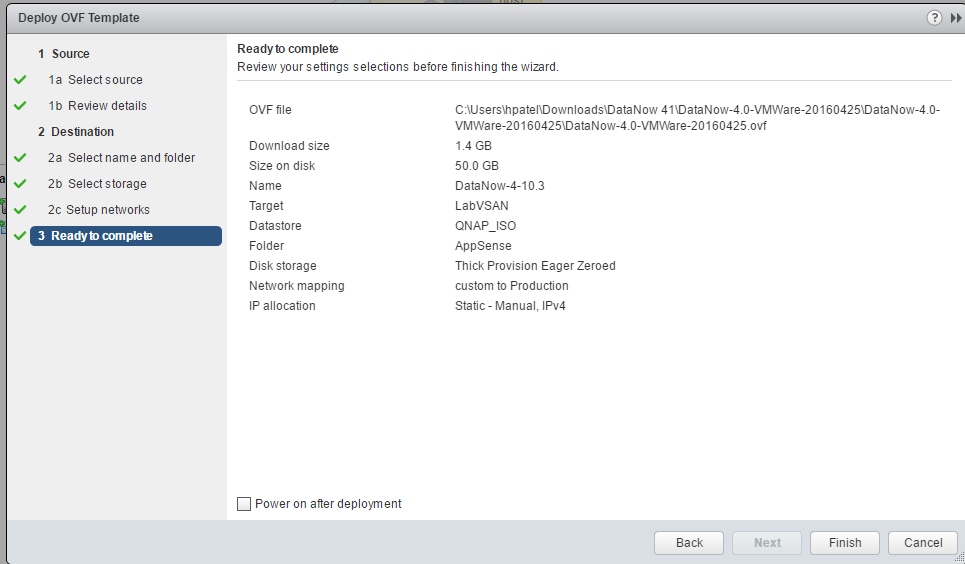
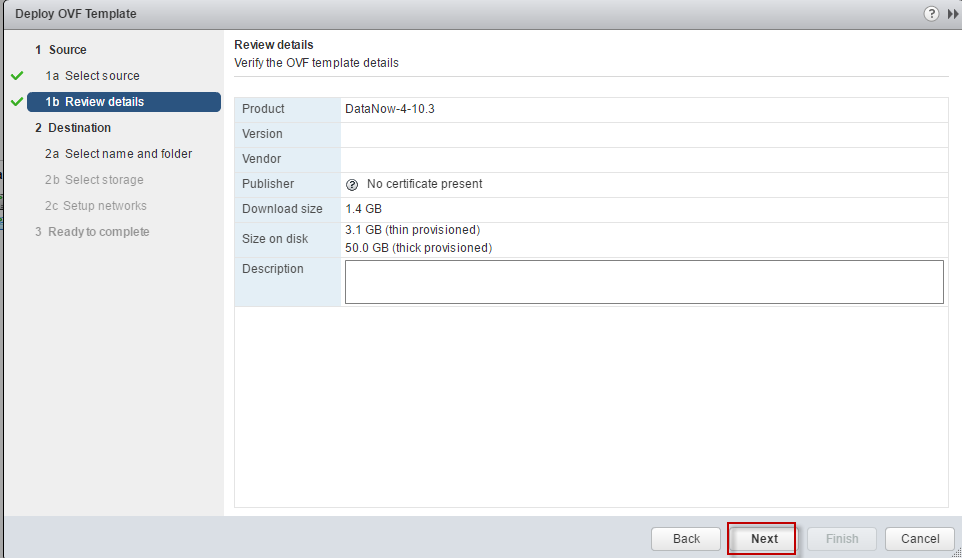
Review the detail and click next, Please do not change disk size on appliance configuration. Leave the default value from the OVF setting.

Select the appliance location and folder and click next

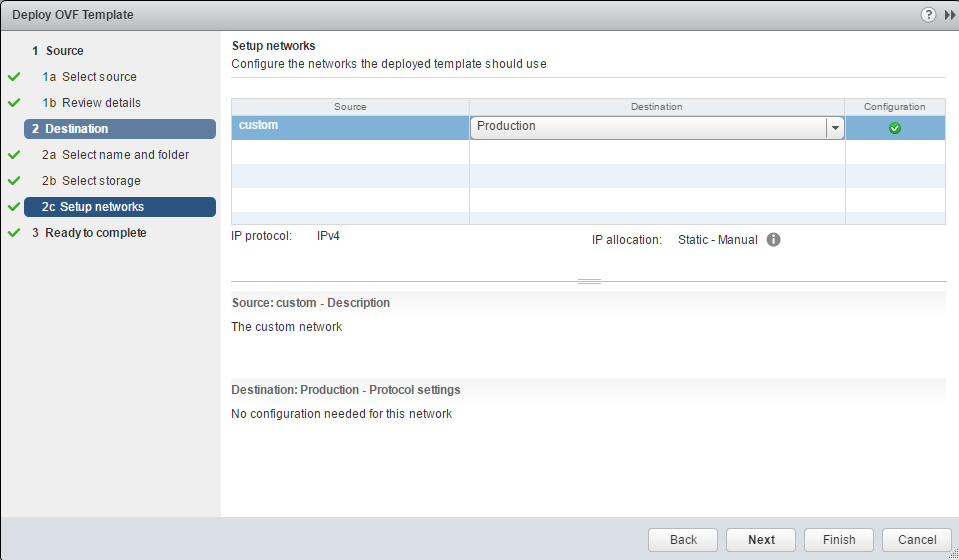
On the storage configuration tab select “Thick Provision Eager Zeroed or “Thick Provision Lazy Zeroed” AppSense appliance support both configuration.

Select the network for the DataNow Appliance and click next, OVF template will import and 
Click finish and ovf import process will start. Once the process finished you should be able to see the Appliance VM in the cluster.
Select the Appliance and Power on the virtual appliance. DataNow can be implemented in a cluster (multiple nodes) as well as a single instance. If you need to implement multiple appliances in cluster mode then you need to have an external MS SQL database. DataNow also supports Always on SQL as well but you need to have SQL local account regardless of SQL failover preference. In this configuration below we will create two instances of an appliance. The second installation will be similar to the first ovf import (do not clone the first appliance). Before we proceed further we need to set basic configuration and reset the default password. On the first powered on cycle, you will see below screen. Press F2 and it will prompt for the password. The default password is “AppSense”. you need to set a new password after this step.
We need to set a new password after this step. Please go ahead and set the new password and confirm the same in the next window.
Configure Networking:  select this option and set the value for hostname, IP address, subnet and gateway for the appliance.
once we configured the below details please press “F10” and it may take up to one minute to respond, Press F4 to return to the main menu and we must reboot the appliance.so it will take the new network configuration. After this, we will be able to browse the appliance through a web console.
Please make sure you have the forward and reverse lookup working for the DataNow Appliance IP(s) before proceeding to the next configuration. Open any browser of your choice and you can use DNS name or IP address for the DataNow appliance followed by port “8443”. e.g. https://192.168.1.56:8443 or https://datanow.homelab.local:8443
Appliance default username is – Appliance and use the password you configure in above section.
once you log in you should be able to see the below home screen. Now we will import license file, configure DNS and search domain, AD setup, Admin users and at last, we will join this appliance to the cluster and update the cluster to version 4.1 and then also import the SSL certs.
Import License file: In order to import the license file we need to login to AppSense portal and download the license file in text format for the DataNow. to upload the file click on Configuration and select choose file, select the license file you downloaded from the AppSense portal and click on upload license file.

DNS and Search Domain: To configure DNS and search domain please select configuration and select DNS, Click the edit button on the DNS page and configure DNS server address and search domain. You can enter multiple DNS servers and search domain to enter multiple DNS servers click on plus sign icon and it will create a new filed of entry
Active Directory: To configure Active Directory please select Active directory tab in the admin portal and click new.
Enter Name: as per your preference, if you have multiple AD servers you can create multiple entries
Server Name: enter DNS name of your AD server
Port: Leave it to default
Home Directory Field: if you have users home directory set in your AD environment DN can read the value from there or if you have to define the new map point then you can select do not read from AD.
Bind username and Password: Enter the Service account for the AD ( require read permission of the AD users and computers,)
Enable SSL: if you need to configure over SSL to AD please check this box and it will change a port value to “636” if you have a custom port for AD SSL then you can change this value manually. Click on Save button.
Kerberos: If you have to setup Kerberos then you need to configure the Kerberos service account with the unconstrained delegation. if you have multiple DN servers then please make sure each entry of the appliance name should have SPN created. Below the screen, you can configure Realm, Ticket size (depending upon your environment you may need to adjust the ticket size) I select 24k and then you need to specify the service account name and password for the Kerberos authentication.
Admin Users: You can now search in AD for the Admin users, Select the users you want to grant the DataNow administrator permission. Unfortunately, DataNow does not support RBAC.
Cluster Configuration: to configure the cluster we need to login back to the vCenter console and supply a cluster name and port. You also notice that the Database configuration tab is also missing. If you do not enable the cluster DN to use the local database.
Log back to the VC console and on admin menu select cluster configuration, in the 
Cluster Name: specify the cluster name ( do not user appliance DNS name as cluster name) and Cluster port. The default port is “49152” and make sure firewall is enabled for multicast in your Datacenter so appliance can communicate between them on the port specified. Press “F10” to accept the changes and reboot the appliance. 
Repeat the same step for all other remaining appliances.
Now log back into the Web console and configure the external database. on your home tab, you should be able to see the following screen. We will configure the External Database as well as we will promote one of the appliances as a Patch server. It will make easier to patch the environment.
Configure Database: select Cluster and Database. on the database, screen select MS SQL 
Do the same SQL configuration for other remaining appliance. Once you configured the external database for all the appliance please reboot the appliances and log back into the web admin console.
You will see all the appliances in the cluster page.
Now it is time to update the appliances to version 4.1 and for that, we will make one of the appliances as a patch server. 
Update Appliance: To select a patch server highlight one of the appliances and click on the Promote to Patch Server.
Once you select the patch server you will be able to see the version of each appliance.
To update the appliance to version 4.1 go to Cluster and update, download the 4.1 patches from the AppSense portal and upload the patch file here.
Now highlight the patch file and click on the Deploy Update
On the next window click “OK” to confirm the update process.
On the next window click on “Reboot” and update process will continue at startup. It may take up to 10-20 minutes depending upon how many appliances need to patch. You can open a vCenter console to see the update status on the appliance console screen.
Once the appliance has been up you can confirm the version by logging on web admin portal to each appliance. Go to Home and version.
Map Point: Now it time to configure the map point for the users. DataNow supports SMB 2.0 and up as well as SMB 3.0.1 with encryption. To configure the map point for the users go to Configuration tab and select map point.
Name: Type a name of this map point, we will use the same name for Windows client configuration setting.
Connection String: type a smb share name followed by environment variable “%UserName%”.
Sync Mode: Automatic ( This option will download all the files to user local machine automatically, a best use case for Physical endpoints)
Manual: This option will download files on users request (a Best use case for VDI Persistence and Non-Persistence model as well as RDSH sessions)
We can configure this setting on an endpoint with the help of UEM solution or GPO.
SSL Certs: You can generate the CSR using DataNow web console or you can use any standard CSR request to generate the request. If you have multiple DataNow servers as well as load balancer VIP please make sure you select the VIP address as a Subject name and all other appliance FQDN name in the subject alternative name, Please make sure you include VIP address again in subject alternative name too. DataNow appliance in cluster mode synchronize SSL certs so you need to import in only one appliance and it required certificate either in PFX or.PKCS#12 format.  To import the SSL go to configuration and SSL certificate.
Backup and Restore: DataNow also provides an option to backup the config and restore if needed.
To back up the config goes to Home and select Backup and Restore.
To back up the config enter the encryption password on backup appliance configuration selection and then click on download the snapshot. ( I wish AppSense use better wording here).
It will download the backup config file into your local disk.
To restore the config click on choose file – select the backup config and provide a password if its password protected and then click on restore settings.
In the next part 2 I will write about the DataNow Windows client configuration setting.

Leave a Reply

Your email address will not be published. Required fields are marked *