In my previous engagement, a customer asked to change the Workspace ONE Access SAML signing cert after a year and a half in production. WS1 Access was fully deployed along with DR sites and configured as 3rd party IDP with ADFS for O365 use cases.
Background:
SAML signing certificates ensure that messages are coming from the expected identity and service providers. The SAML certificate is used to sign SAML requests, responses, and assertions from the service to relying applications, such as WebEx or Google Apps.
The SAML Metadata page displays from the Catalog > Settings tab. The SAML signing certificate is displayed. Links for the SAML Identity Provider and Service Provider metadata files are also available from this page. The metadata includes configuration information and certificates.
A self-signed certificate is automatically created in the Workspace ONE Access service for SAML signing. If your organization requires a certificate from a certificate authority, you can generate a Certificate Signing Request (CSR) from the Workspace ONE Access console and use the CSR for generating a certificate. When you receive the signed certificate, you upload the certificate to the Workspace ONE Access service, replacing the self-signed certificate. The SAML signing certificate and the SAML metadata files are updated with the new certificate.
There are five main steps involve changing the SAML signing certificate from WS1 Access to third party CA. We will also re-generate an Encryption certificate during this process. Changing the Encryption certificate is totally optional.
- Generate New Certificate Signing Request (CSR) to use third party CA in WS1 Access
- Get a Certificate in.CER format from Signing Certificate Authority
- Upload new certificate into WS1 Access
- Refresh MetaData to All Connectors
- Upload/re-configure Relying Party Trust and Claims Provider Trust certificate
Let’s dive into each of these.
- Generate a New Certificate Signing Request (CSR) from WS1 Access
To use an external certificate for SAML signing, you must generate a Certificate Signing Request (CSR) from the Workspace ONE Access console. The CSR is sent to a certificate authority to generate the SSL certificate.
Note: A certificate generated without the CSR from the Workspace ONE Access console is not supported.
Procedure
- Login to WS1 Administrator console as a root account, e.g https://access.domain.com/SAAS/auth/0
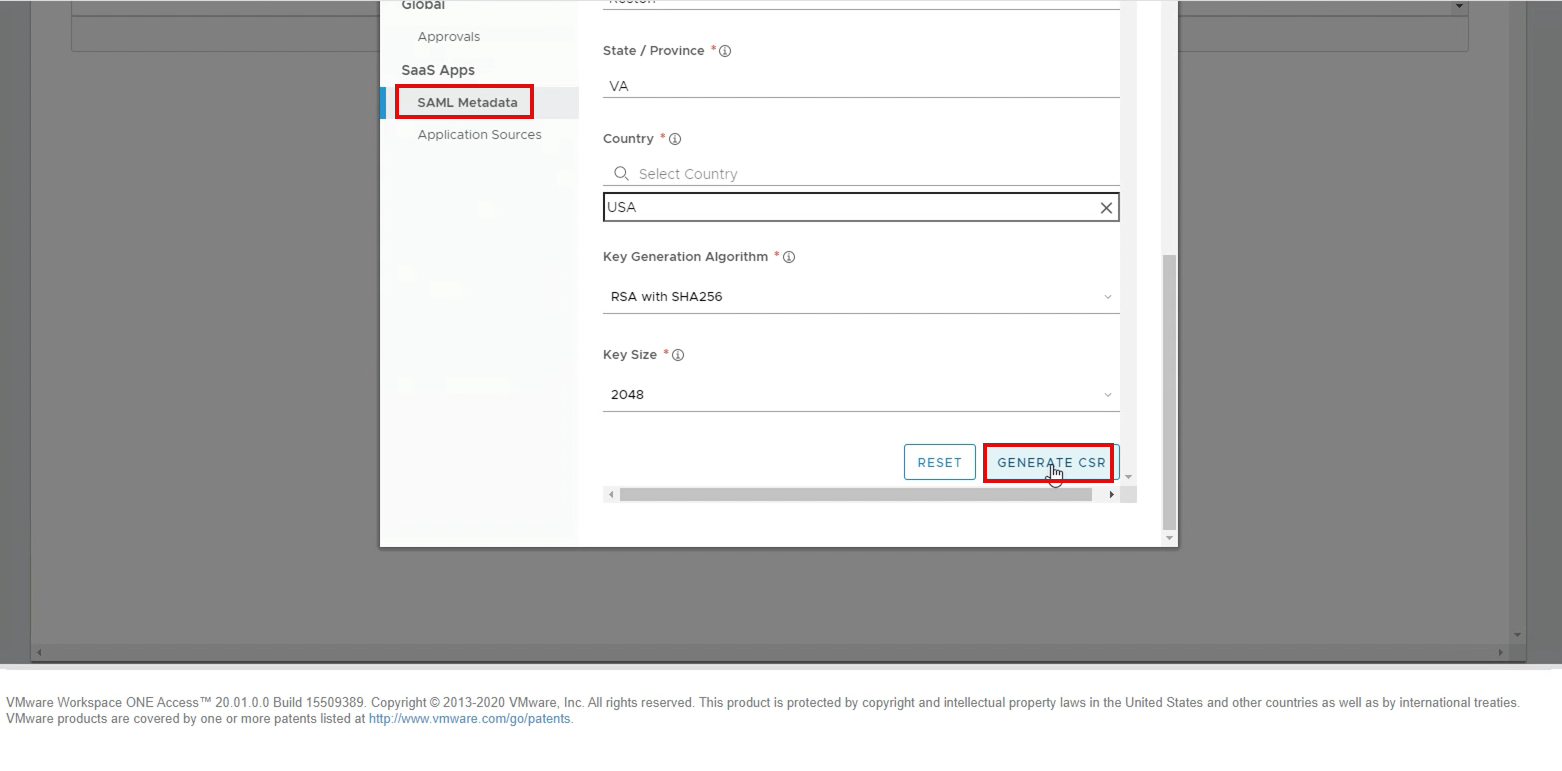
- In the Catalog tab, select Web Apps Settings > SAML Metadata.
- Click Generate CSR
- Enter the requested information—options with an asterisk (*) are required.
- Click Generate.
|
Option |
Description |
|
Common Name* |
Enter the fully qualified domain name. For example, www.example.com or awidm.domain.com |
|
Organization* |
Enter the legally registered name of the organization. For example, Mycompany, Inc. Acme INC |
|
Department |
Enter the department in your company that is added to the certificate—for example, IT Services. |
|
City* |
Enter the city where your organization is legally located. |
|
State/Province* |
Enter the state or region where your organization is located. Do not abbreviate. |
|
Country* |
Enter a few letters of your country name to select the correct country from the list. |
|
Key Generation Algorithm* |
Select the secure hash algorithm used to sign the CSR. |
|
Key Size* |
Select the number of bits used in the key. RSA 2048 is recommended. RSA key size smaller than 2048 is considered insecure. From 20.01 onwards, we do support 4096-bit key. |
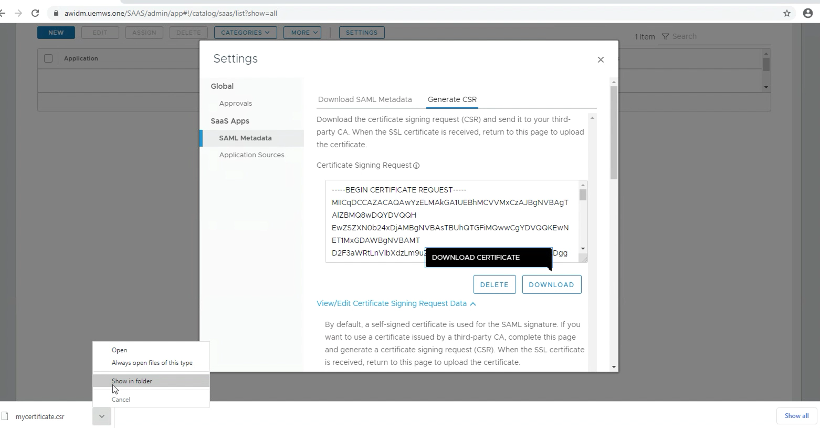
6. Download CSR to submit for 3rd party CA: On the Generate CSR page, click on Download Certificate to download the CSR.
- Get a Certificate in.CER format from Signing Certificate Authority
The next step in this process is to get the signed certificate from the Cert Authority; in the below example, we will use Mircosoft CA.
If you have MS CA for internal signing cert and have access to request the cert, please follow the below procedure or follow the CA provider guide. You should select the Certificate request type as “Webserver” if you have other CA please follow the CA guideline.
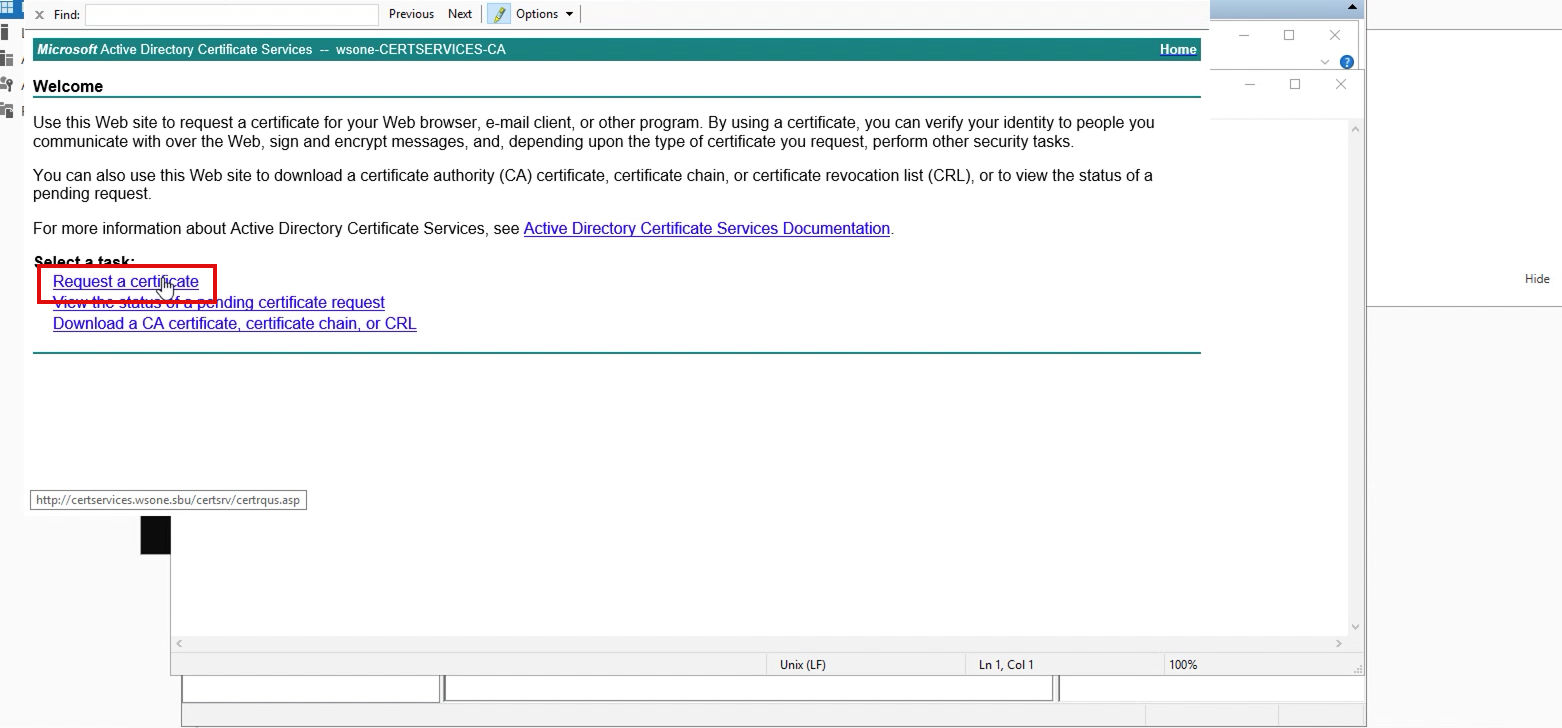
- Go to the certificate enrollment page on your CA server; in my lab, it looks like “https://caserver.com/certsrv” and selects Create and submit a request to this CA.
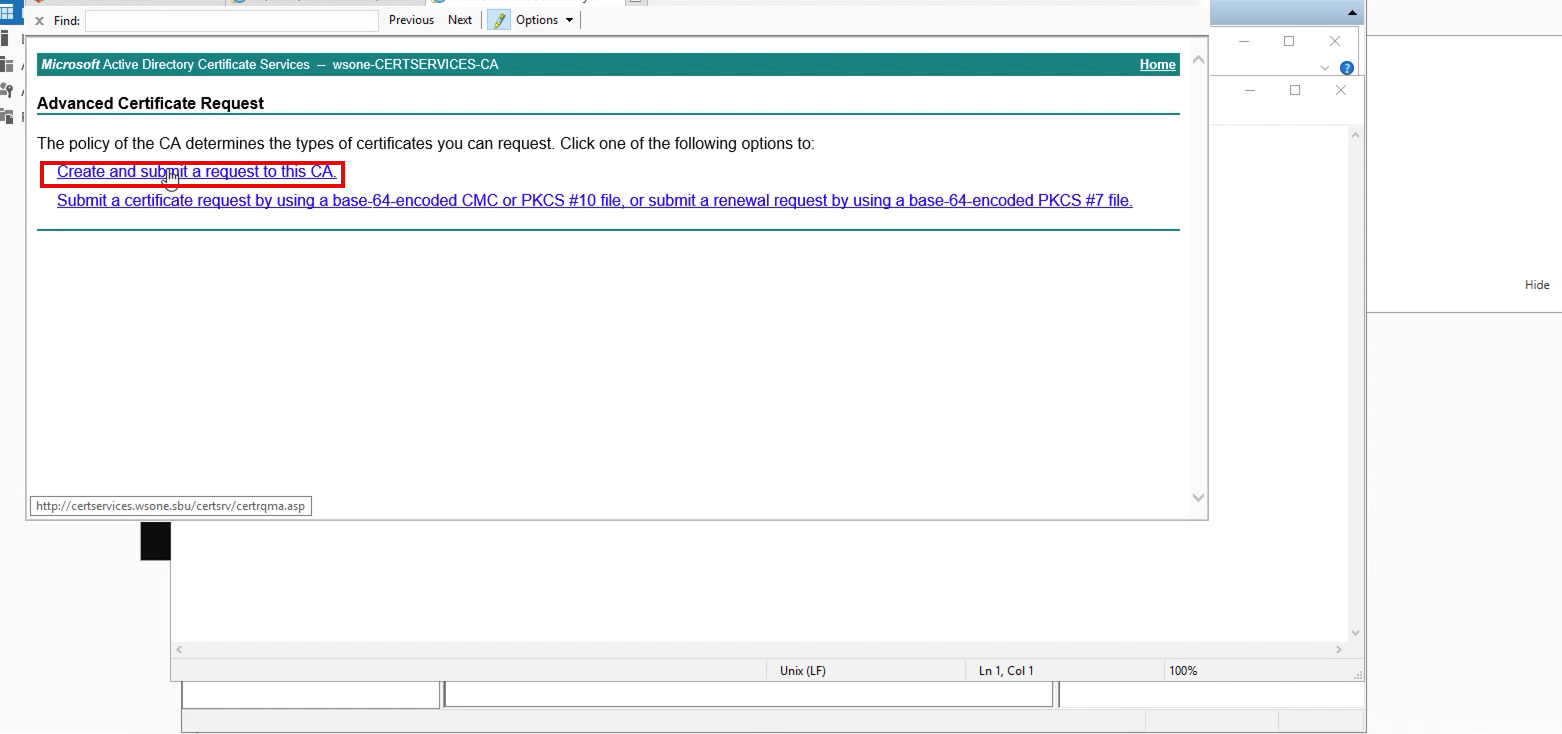
2. On the next page, select Advanced certificate request
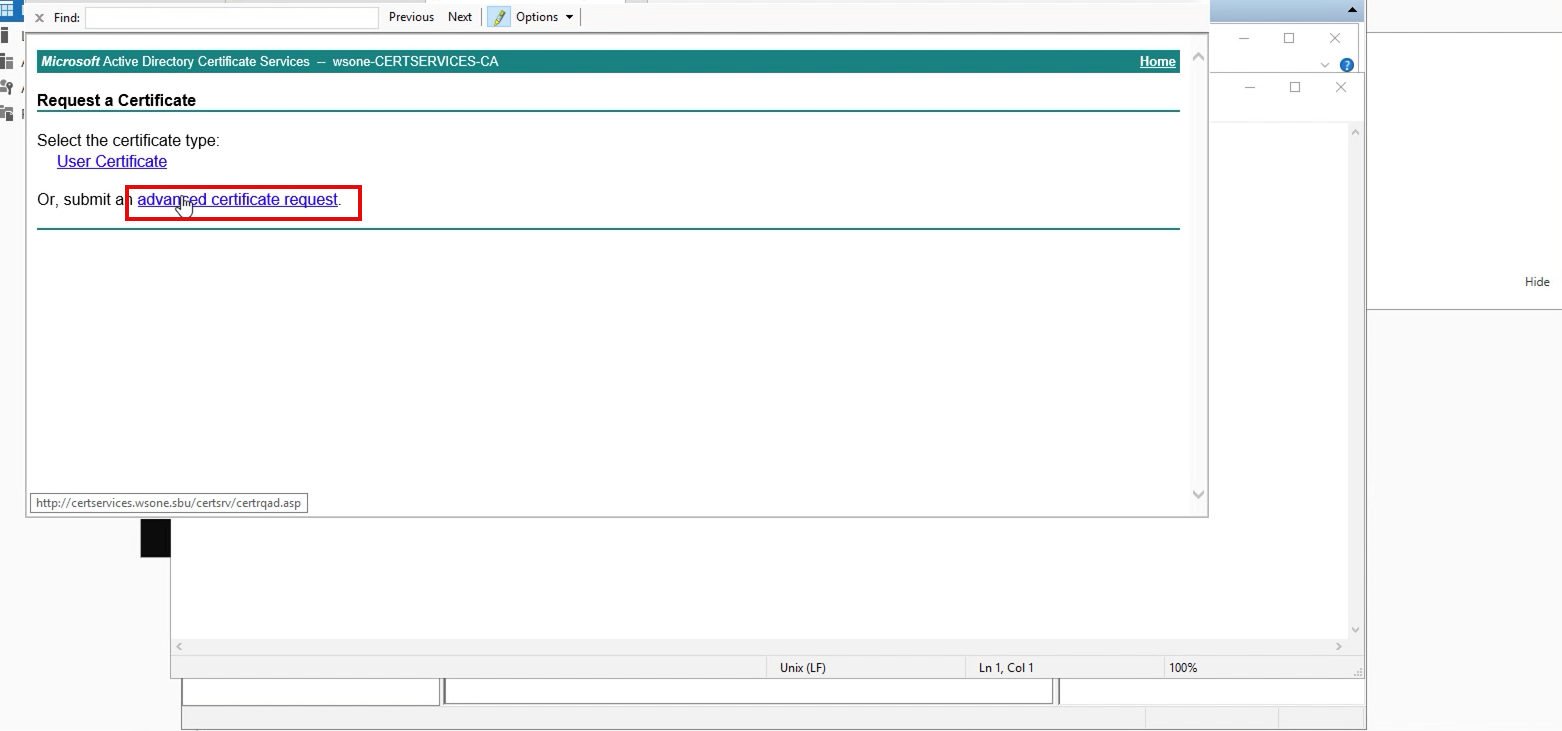
3. On the next screen, choose the option”Request a Certificate.”
4. Copy/paste CSR request from the previously downloaded CSR from WS1 Access, and select certificate template as “WebServer.”
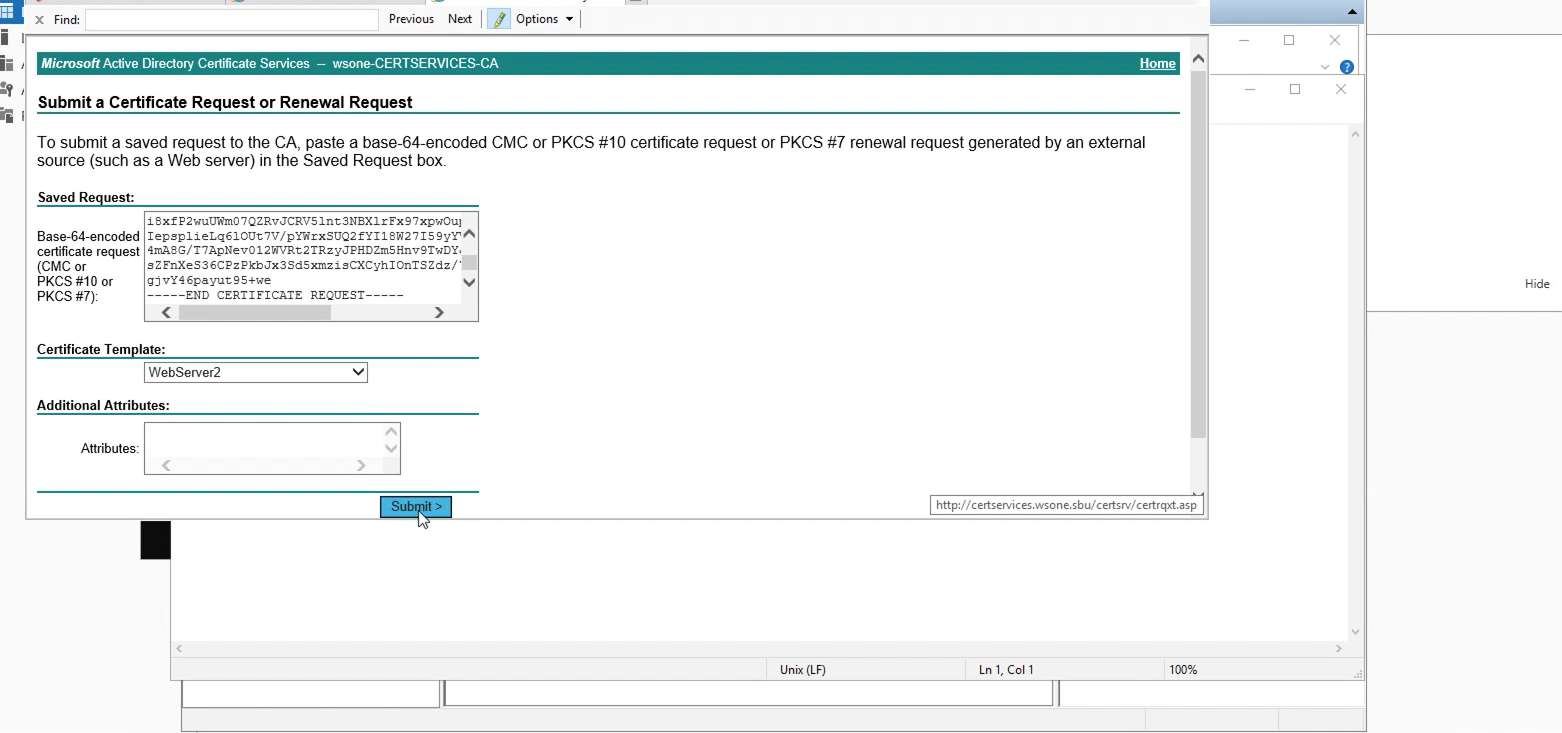
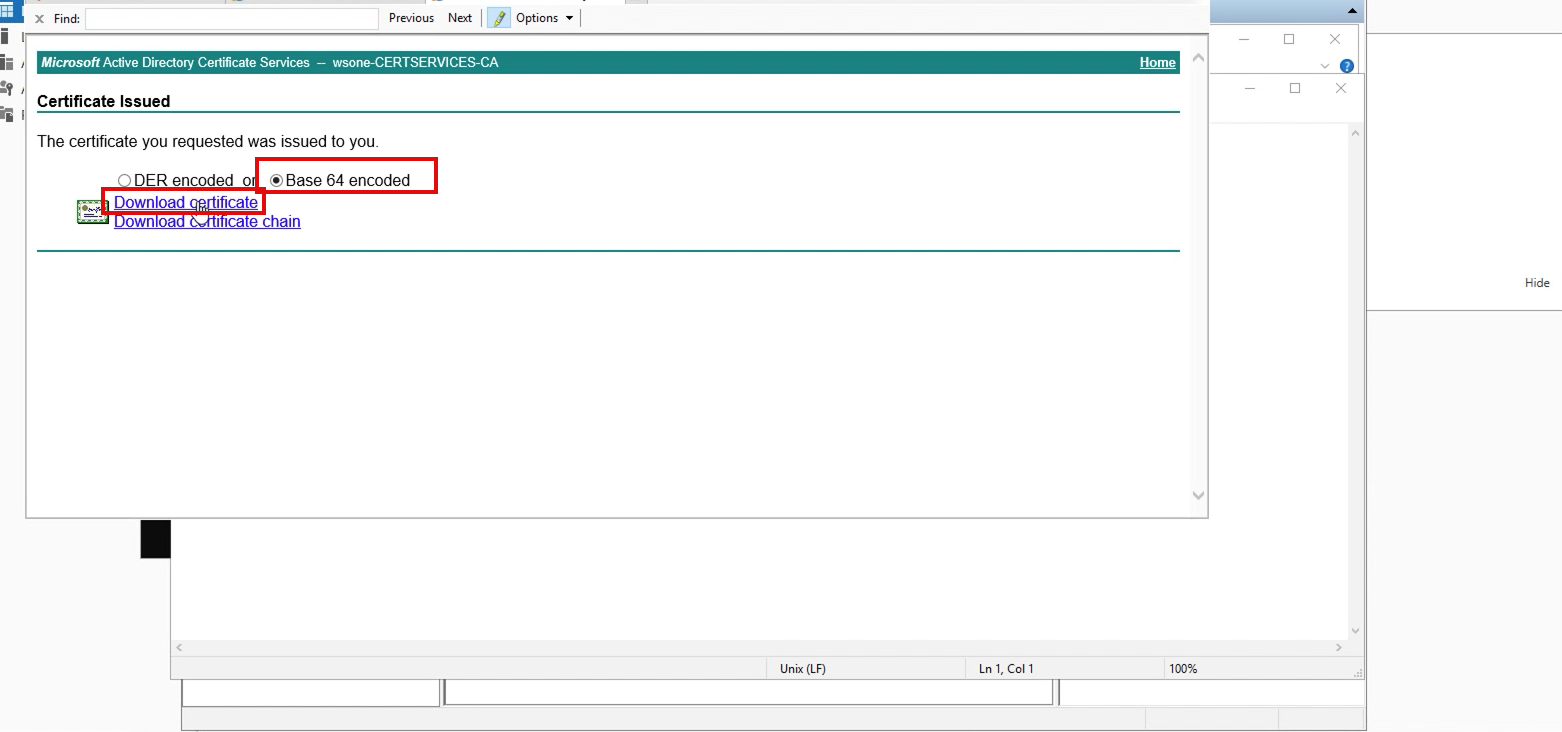
5. Depends on your configuration, you should be able to download the certificate immediately.
Upload new certificate into WS1 Access (End User Interruptions, since trust will be broken at this time until we configure and upload new cert to ADFS and Refresh MetaData)
1. – Login into WS1 Access admin console as a root account, and navigate to Catalog > WebApps > Settings > SAML Metadata and Select Upload Certificate from the CA authority and Continue on Confirm page.
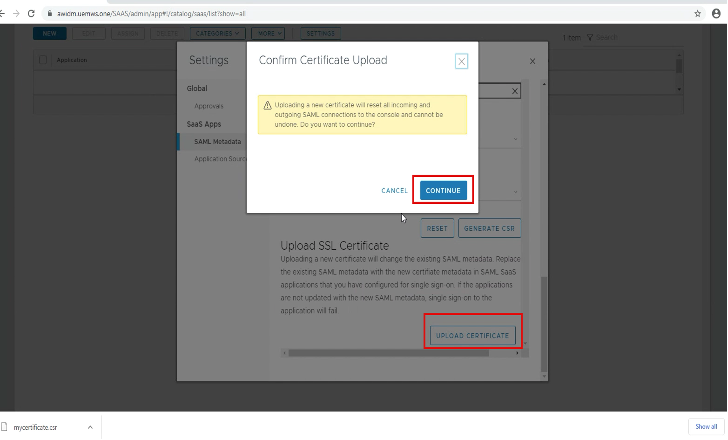
Note. At this stage, a trust will be broken from Access – ADFS.
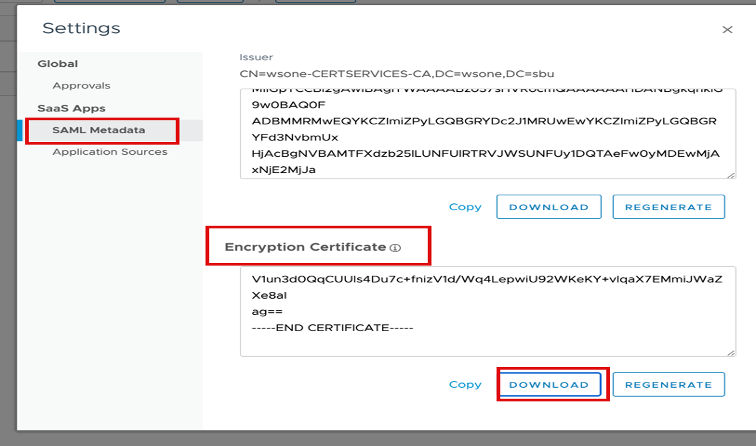
2. – To regenerate the encryption certificate, select on “Regenerate Cert” on the Encryption Certificate section.
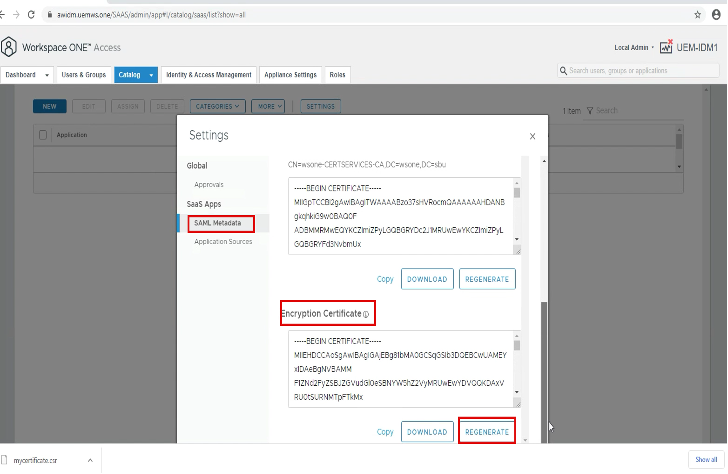
3. – Download the new Encryption Cert for ADFS upload.
Refresh MetaData Refresh Metadata to all Connectors
This task is important since Access connectors use the SAML signing certificate.
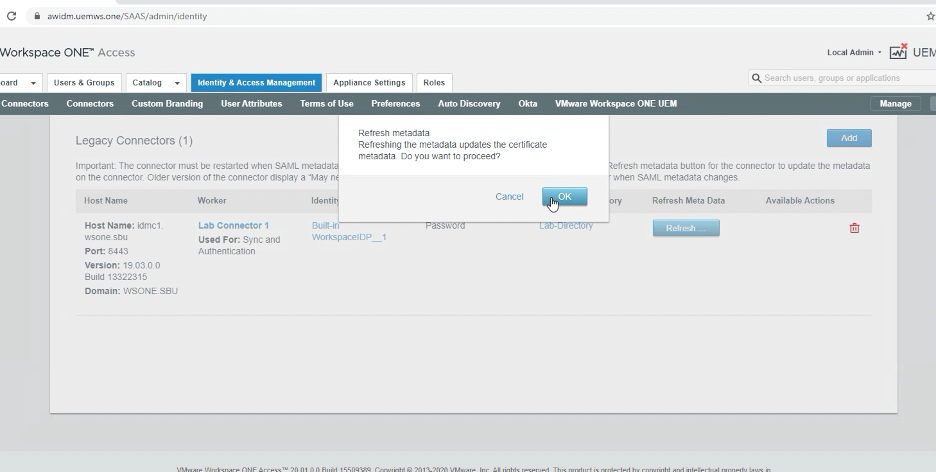
1. – To refresh metadata to all connectors, to do this make sure you have all connectors servers are power on (Including DR Connectors), and proceed.
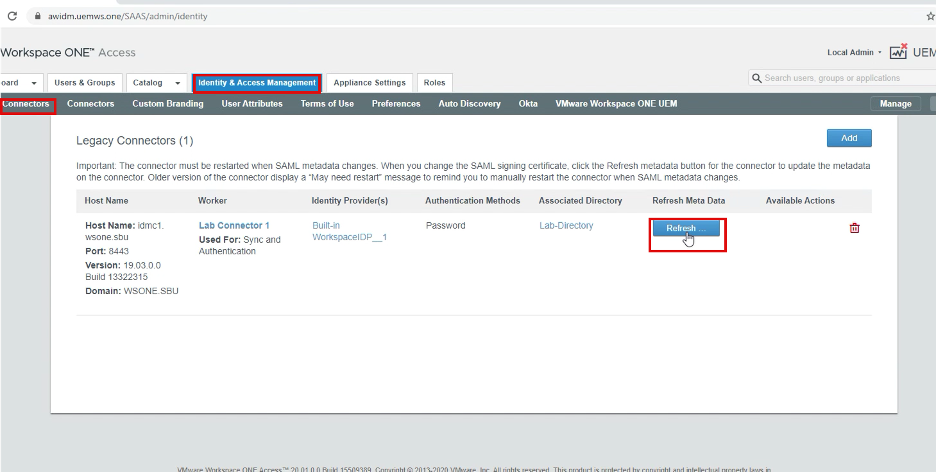
2. – Log in to WS1 Access as the root account, and navigate to Identity & Access Management > Connectors > Refresh Metadata to each connector.
Upload/re-configure Relying Party Trust and Claims Provider Trust Certificate
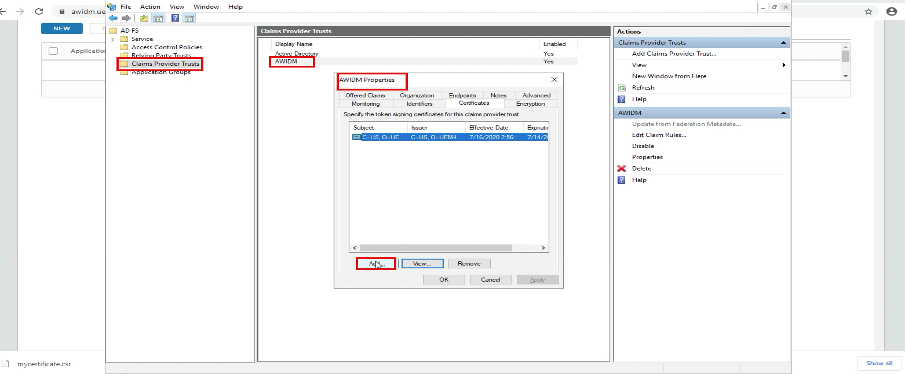
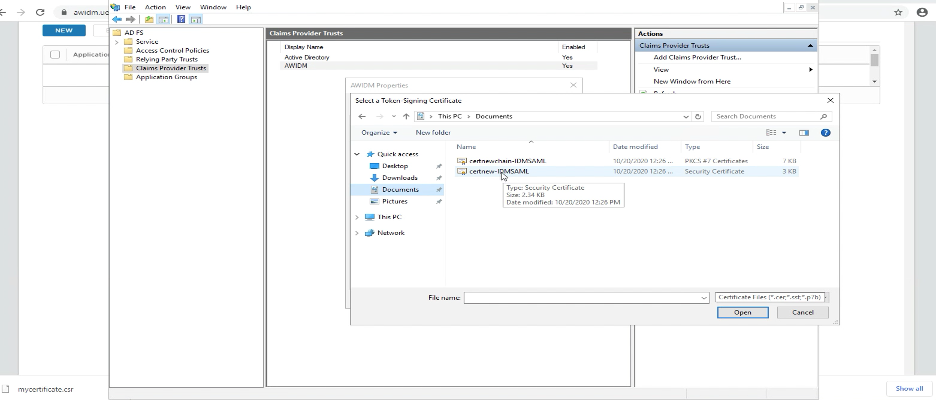
Log in. to your ADFS server and open ADFS. application, go to Claim Provider Trust, Select AWIDM > Properties.(Your Display name could be different, but select WS1 Access environment you configured previously)
On the Properties page, go to Certificate and upload the certificate from 3rd party generated Certificate
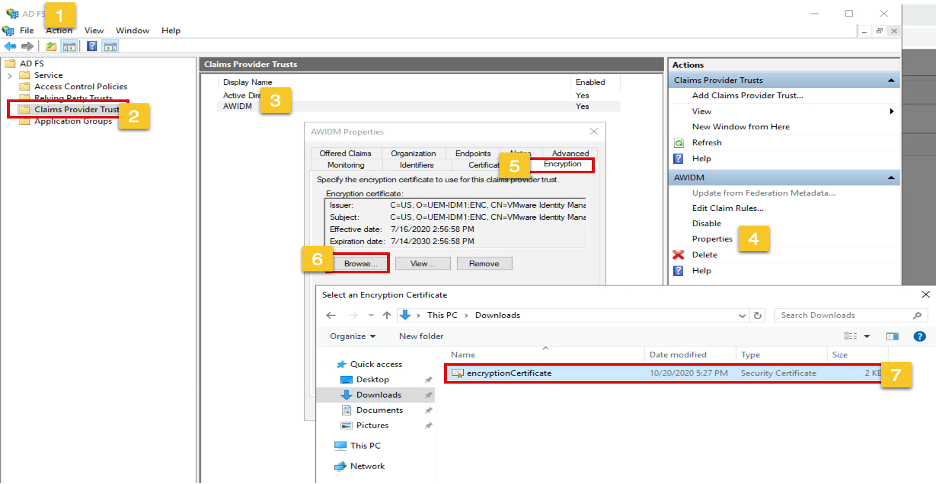
2. To update the Encryption cert, Open ADFS and go to Claim Provider Trust, Select IDM > Properties>Encryption and select the Encryption Cert you download.
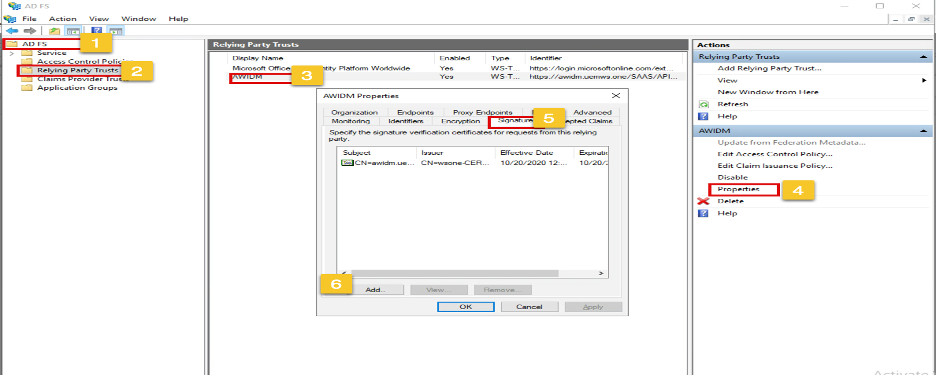
3. Update Relying Party Trust Signature Certificate Open ADFS and go to Relying Party Trust, Select IDM > Properties
On the Properties page, go to Signature and upload the certificate from 3rd party generated Certificate and remove the old cert.
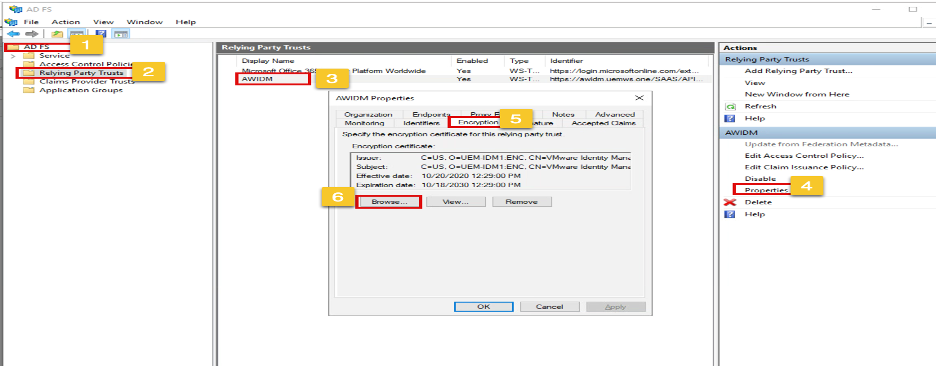
4.Update Relying Party Trust Encryption Certificate Open ADFS and go to Relying Party Trust, Select IDM > Properties
On the Properties page, go to Encryption and upload the Encryption certificate from WS1 Access Same Cert from C3 and remove the old cert.
PS. In my experience sometimes you may have to delete the Access configuration completely from Relying Party Trust and have re-add, If this is the case, please make sure you have a copy of all claims rule.